Adding elements into your scene
The 5 types of element
There are five types of elements that can be added to a scene, and each of them can act as a trigger for the action in your game.
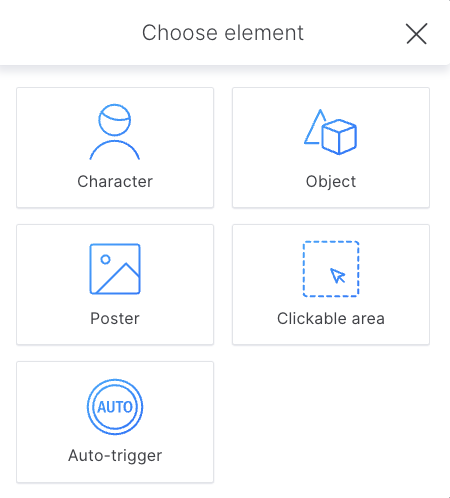
- Characters are 3D elements you choose from the library and position in the scene. Characters can be assigned voices and can be animated.
- Objects are 3D elements you choose from the library and position in the scene. Objects can be collected and used in mini-games.
- A poster is a 2D image that you can upload to the library then position in the scene. It can also be used to create customized backgrounds.
- A clickable area is an invisible 2 d plane that you size and position in the scene. It allows you to make any static area or part of the background clickable. This clickable area may be, for instance, a door, a desk, a shelf, etc.
- An auto-trigger is different since it’s not an element within the 3D space. Instead it allows you, as the name would suggest, to trigger a flow automatically without the player having to click. It will launch the flow as soon as the player arrives to the scene.
Be careful: There’s a functional limit to the number of 3D elements you can add to a scene depending on the complexity of the 3D models you choose. Bear in mind that your player’s computer will have to render all of these elements on screen in a matter of seconds. A simple geometric shape like a box will render quickly, but a complex model like a tree, for example, will require more capacity and time to load.
Using in-scene elements as triggers for interactivity
The game-play in the Editor allows you to use anything in the scene to create interaction with your player. You, as the creator, decide where the player can click within a scene, and what will happen when they do.
The actions or events that happen when the player clicks on a particular element, is called a flow. “Flow” is our short hand for a chain of building blocks. In other words, when the player clicks on that element in the scene, it will launch the chain of building blocks you attached to it. A building block can display a text, show a dialog between characters, ask multiple choice questions etc etc. How you combine and order the building blocks is how you create learning experiences. To go more in-depth on how to build a flow and see examples in the next section of this help, click here.
In the Editor, you are free to create all the flows you want by combining all the building blocks you want. The limit is your creativity!
But bear in mind that the objective of a serious game is to display learning content, in order to teach a new skill or communicate some information, and then practice this new skill or learn how to use this new information.
This is what we call game-based learning.
Adding a character to a scene
Characters in your story can act as mentors, confidants, antagonists, or simply random bystanders like extras in a movie.
To add a character to a scene:
- Click on the “+element” that corresponds to the scene in which you want to add it.
- Choose which type of element you wish to add in this case a character.
- The library will open, filtered to the characters.
- Search the library for the character you want and click next.
Tip: For your convenience avatars that you have already used in your game will appear at the top of the library with the names you have given them
- Position the character in your scene and click next.
- Give your character a name
Be careful: Give your character a unique name. Bear in mind that your player will see the characters’ names.
Note: If you use the same avatar multiple times the Editor will indicate automatically which scene and version
- Optionally, choose a synthetic voice for your character. In the drop-down list, you can use the play buttons to listen to a sample of each voice.
- Set the initial state for the element. Choose whether the character is active, visible but not yet active, or invisible.
Note: Active means that the player can click on it. For an explanation of element states, click here.
Adding an object to a scene
Objects can be added to your scenes to act as clues, tools, or simply as set decoration. Objects can be collected using the “pick up object” block and can be later used in the Drag Object minigame.
To add an object to a scene:
- Click on the +element that corresponds to the scene in which you want to add it.
- Choose which type of element you wish to add, in this case, object.
- The library will open, filtered to objects.
- Search the library for the object you want and click next.
- Position the object in your scene and click next.
- Give your object a unique name a unique name
Be careful: Give your character a unique name. Bear in mind that your player will see the characters’ names.
- Optionally, add a description of the object. This will be shown to your player when they collect it.
- Set the initial state for the element. Choose whether the object is active, visible but not yet active or invisible.
Note: Active means that the player can click on it. For an explanation of element states, click here.

Adding a poster to a scene
You can include a 2D image into the scene for various uses including:
- for decoration, in order to put a company logo on a reception desk, an image on a TV, a poster on a wall etc.
- to serve as indicators for the player to click e.g. an email icon appearing above a computer.
- as a full background for the scene. More on this trick in this tutorial
Tip: If your image isn’t perfectly rectangular you should upload a version with a transparent background for the correct effect.
To add a poster to a scene:
- Click on the +element that corresponds to the scene in which you want to add it.
- Choose which type of element you wish to add, in this case, poster.
- The library will open, filtered to the 2D images you have uploaded. The supported formats are JPG/JPEG, PNG, and static GIF.
- Search the library for the element you want and click next.
- Position the image in your scene and click next.
Tip: The poster will initially appear with its center at floor level and its x and y axis parallel to the wall behind it.
- Give your poster a unique name
Be careful: Give your poster a unique name.
- Set the initial state for the element. Choose whether the object is active, visible but not yet active, or invisible.
Note: Active means that the player can click on it. For an explanation of element states, click here.
Adding a clickable area to a scene
You can use a clickable area to make anything in the players view clickable and therefore a trigger for a flow. It is most useful for adding interactivity to some feature of the background, most commonly a door, for example.
Tip: You may also choose to use a clickable area on top of an object that is quite small,and therefor might be difficult to click on.
To add a clickable area to a scene:
- Click on the +element that corresponds to the scene in which you want to add it.
- Choose which type of element you wish to add, in this case, clickable area.
- Position the area in your scene and click next.
Tip: The clickable area will initally appear with its centre at floor level and its x and y axis parallel to the wall behind it.
- Give it a unique name
- Set the initial state for the element. As the clickable area is always invisible it only has 2 states; Active and Inactive.
Note: Active means that the player can click on it. For an explanation of element states, click here.
Using the automatic trigger
Sometimes the gameplay or storytelling requires that actions occur and content be displayed, without the player having to click to trigger them. For this, we have the automatic trigger.
Common uses for the auto trigger are:
- giving context for the point of the story we are in, e.g. notification block
- displaying instructions to the player on what to do in the scene, e.g. objective block
- or showing the passage of time between the last scene and this one. e.g. comic block
Note: Only one auto-trigger can be added per scene, and it will launch as soon as the player reaches that scene.
To add an auto-trigger to a scene:
- Click on the +element that corresponds to the scene in which you want to add it.
- Choose the auto-trigger
- Give it a unique name and save.
- You can then build the flow of actions that will happen as soon as your player arrives to that scene
Replacing a trigger or element
Elements can be switched out for other elements easily. You might want to do this because you want to change what element in the scene triggers the flow or simply to change the look of a character, use a different object etc..
To replace an element
- Click on the swap icon on the element block
- Choose which kind of element you wish to replace it with
- Search the library for the element you want to use
- Once you have chosen click next
- Position the element in the scene
Note: if you have chosen an auto trigger you will skip this step
- Give your element a unique name and save
- If you still want your original element to be in the scene (but not triggering the flow) you can add it to the scene again.