Learning Pathways
A learning pathway is a set of courses (either customized or from the Gamelearn catalog) that have a common theme. They are correlative and intended to be played in order like a learning journey aimed at enhancing the skills of the students.
Learning pathways are created in the Admin and displayed on the Campus.
The basic steps to get started with the learning pathways are as follows:
- Create and set them up.
- Publish them.
- Create classes with learning pathways (*only for learning pathways with a finish date).
Create learning pathways
To create a learning pathway, follow these steps:
- From the Admin side menu, select “Campus”.
- Select “Learning Pathways”.
- Click on the “Create Learning Pathway” button.
- Enter the name of your learning pathway.
- Choose the base language (you can always translate your learning pathway’s information into other languages available on the Campus).
- Create a description.
- Add information about objectives and content.
- Choose who can access the course.
- Select an image for each card.
- Select the courses you want to include in your learning pathway and click on “Add courses”.
- Use the “drag” option to define the order in which the courses should be taken.
- Choose whether or not the itinerary will have a diploma. Remember that from the Admin, you will only be able to download diplomas belonging to the whole learning pathway, not to each individual course in it.
- Save the learning pathway.
You will automatically be redirected to the “Translations” tab, so that, if necessary, you can add the translated learning pathway information.
- Access the “Settings” tab.
- Scroll down and click “Publish”.
Remember: once a learning pathway has been published, it’s not possible to edit the information or the order of the courses, nor add or delete courses.
When published, the learning pathway will be available on the Campus based on the default access. You can always manually modify access to a specific learning pathway by following these steps.
Video – Creating learning pathways
Edit a learning pathway
You can edit an already-created learning pathway at any time.* To do so, follow these steps:
- Click on the “Campus” section on the left-hand side menu.
- Click on “Learning pathways.”
- Hover over the learning pathway you want to edit.
- Click “View/Edit”.
- In the “Settings” tab, make the necessary changes.
- Save changes.
Remember to publish the learning pathway from the “Settings” tab.
*Important: if the learning pathway is a “Draft”, in other words, it has been created but not yet published, the courses that make up the learning pathway and the order can be edited. However, once a learning pathway has been published, it’s not possible to edit the information or the order of the courses nor add or delete courses.
Learning pathway duration
A learning pathway duration is the sum of the duration of the courses included. If the duration of one of the courses is modified, the duration of the learning pathway will also be modified.
You can see the duration of a learning pathway by following these steps:
- Click on the “Campus” section on the left-hand side menu.
- Click on “Learning pathways.”
- In the card, you can consult the duration and the courses included in the learning pathway.
Language of the courses in the learning pathways.
When creating a learning pathway, you can choose its base language. However, it should be taken into account there may be courses in different languages in a learning pathway. This means a learner can take the first course of a learning pathway in one language, but take the second in another language if it’s not translated into the base language.
Set default visibility for all learning pathways
From the Admin, you can define who’ll see the learning pathways on the Campus, establishing the default (predefined) access.
To set up access to the learning pathways, follow the same steps as when setting up access to courses:
- Click on your name initial (profile), found in the top right corner.
- Click on “My account”.
- Go to the “Settings” tab.
- Scroll down to the “Access to courses and diploma” section. Use the dropdown of the option “Who can access the courses and learning pathways”. Choose the desired option:
- All students: accessible to all students who have access to the Campus.
- Classes only: accessible only to students previously enrolled in a class.
- No one. Not visible on the Campus: the course cards will not be visible on the Campus to any student, so no one will have access to them.
- Save changes.
Configure access for a specific learning pathway
If you prefer, you can set up access to a specific learning pathway. To do so, follow these steps:
- Click on the “Campus” section on the left-hand side menu.
- Click on “Learning pathways.”
- Hover over the learning pathway you want to edit.
- Click “View/Edit”.
- In the “Settings” tab, go to the “Learning pathway settings” section.
- Choose the desired mode in the “Who can access the course” dropdown.
*You can choose the option you have in the “default” state.
- Save changes.
Note: The best option if you don’t want your students to see a learning pathway will always be to change the access setting to “No one. Not visible on Campus”, and, if there are active registrations, cancel them so they don’t continue playing.
Additional information: you can only delete learning pathways if there are no active classes or registered students.
Video: managing learning pathways
Create classes with learning pathways
Create classes with learning pathways, enroll your students in them, and organize your learning pathways by dates, themes, student groups, etc.
Prerequisites
- Have access to the Admin.
- Before you start playing, perform the technical test to make sure everything is working properly.
- Check that the games associated with a class with a learning pathway are accessible to all students who are going to be enrolled.
To create a class with learning pathways, follow these steps:
- Select the “Campus” option in the left-hand side menu of Admin.
- Click on the “Classes” button.
- Click on the blue “Create class” button.
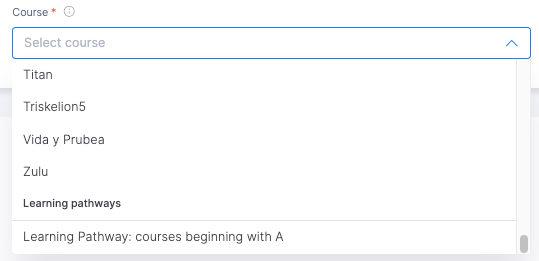
- Fill in the fields in the “Class information” section, including the dates.
Remember: your learning pathway will be in the “Courses” dropdown menu, at the bottom, in the “learning pathways” section.
- Choose if you want to send the class/learning pathway start notification (this option will always be enabled by default).
- Click on “Save”.
| ℹ️ Tip: You can register your students at this point or close the tab and do it later. |
Delete learning pathway
Learning pathways created and published can be deleted from the Admin.
Prerequisites
Don’t have any active class created or any student enrolled in the learning pathway.
To delete a learning pathway, follow these steps:
- Click on the “Campus” section on the left-hand side menu.
- Click on “Learning pathways.”
- Hover over the learning pathway you want to delete.
- Click on the three dots at the top right.
- Select the “Delete learning pathway” option and confirm.