Setting your game’s public information
Your players can access the Campus to browse, choose and play the games you create. In order for the player to know what they will learn in your games and to entice them to play you can include a description, learning objectives, and more in the Information section of the game.
The games on the Campus will be displayed in the form of course cards which include an image, name, topic, and creator. When the user hovers over the course card the description becomes visible.
When the user clicks on the game it will open a page displaying the description and all the information you have added in the optional fields. If you are using SCORM to give access to the games you create then this article is not relevant.
Adding the game’s description and details
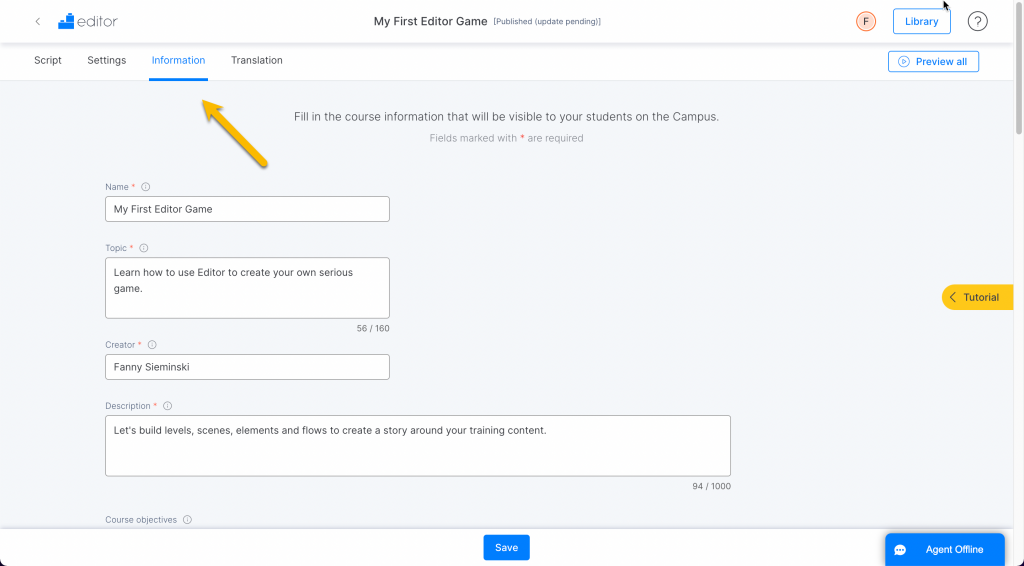
- In the Editor find your game and click on the pencil to enter edit mode.
- Go to the Information tab
- FIll in the information about your game in the sections available.
The sections that you need to fill are the following:
- Name: A unique name for your game
- Topic: Explain, in a sentence, what the game is about. Max. 160 characters
- Creator: Who created the game? You can put your name or the name of your organization, for example.
- Description: Describe your game in a brief but engaging way. Remember that your players will choose whether or not to play your game based on this information. Max. 100 characters
You can also optionally fill in the following sections:
- Course objectives: Here you can explain in more detail the learning objectives for this course and what the player can expect to know when they finish. This text can be formatted using the WYSIWYG controls
- Content: Use this section to give a breakdown of the content of the course. This text can be formatted.
- Target audience: Indicate what type of profile your course is aimed at. Who is your target learner?
- Duration: Give an indication of the estimated time it would take to complete your course. This information will be displayed on the course card. We recommend using an average of the time taken by the first few players. You can check this in the Admin
Adding an image for the course card
The course card is the basic game information visible to the players on the Campus. You can create an image using a character or a screenshot from your game, or something that represents the gameplay or learning content. Think of your course image like it’s a movie poster. You can upload one thumbnail image for the course card and a larger image for the details page of your course.
To add the images for the course card and details page:
- In the Editor find your game and click on the pencil to enter edit mode.
- Go to the Information tab
- Scroll down to “Image for the course on the campus”
- Click on the pencil on the course card preview and the library will open
- Choose an image from the library or upload one from your computer and click next.
- Below the course card preview, you can see the preview of the banner for the details page. Again, to add the image, click on the pencil and choose one from the library.
Note: Recommended size for the course card thumbnail is 504 x 280px and for the details page banner is 2560 x 448px
- If necessary you can adjust the cropping of the image for mobile devices by clicking on the icon beside the preview
Adding a contact for in-game support
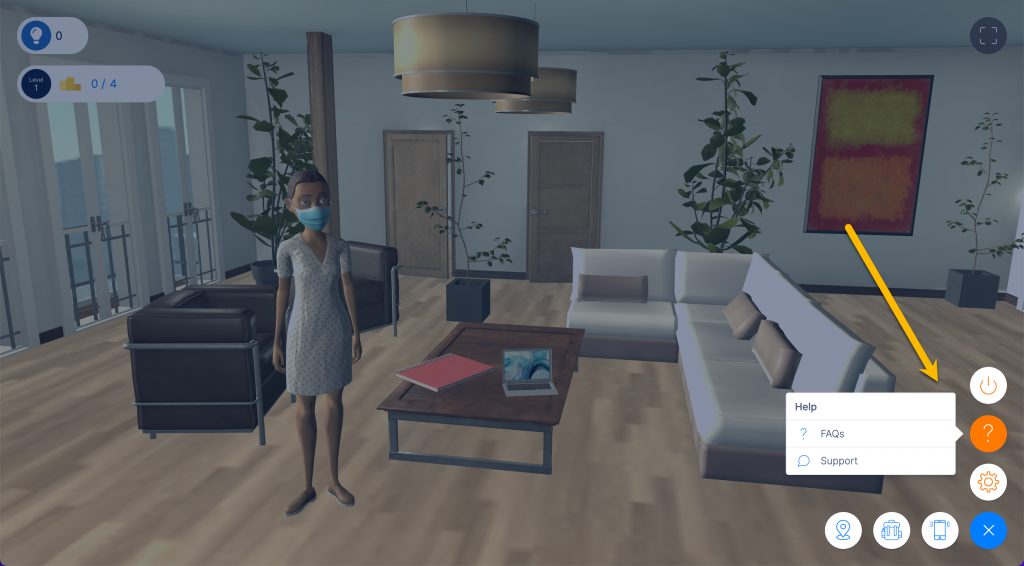
It is possible that your players may have questions about the game or its contents while they are playing. For this we have created an access within the game interface so that the player can contact you, the creator and/or access your FAQ page.
The player can access the help from here:
To add help resources for you player:
- In the Editor find your game and click on the pencil to enter edit mode.
- Go to the Information tab
- Scroll down to “Support” at the bottom of the page
- In the ”Support contact” field you can enter a URL to a contact form or an email address.
- Optionally, in the “Frequently asked questions” field you can enter a URL to your preprepared FAQ page or a contact email.
Adding a trailer for your game
If you have created a video trailer for your game you can also include it to be viewed on the game details page. And from the campus your course card will have a play button on it to launch the trailer.
Tip: There are many tools on the market to allow you to make a trailer quickly and easily. You can use some screen recordings of your gameplay and a tool like Canva to add graphics.
To add your trailer:
- In the Editor find your game and click on the pencil to enter edit mode.
- Go to the Information tab
- Scroll down to “Image of the course on the campus”
- Under the preview of the course card, select the check-box labeled “Trailer”
- Click on the pencil icon on the card that appears and the library will open.
- Select the trailer video from the library or upload it from your computer and click next.