Translating your game into other languages
The Editor enables you to translate your game into over 20 languages, helping you reach a global audience. Once you have completed, activated, and published a translation for a game, players will automatically have the option to play the game in that language when they start.
Note: Before you start translating your game, make sure you have reviewed and tested your content, and only translate the final version of the game.
Be careful: There is no automatic saving in the Translation tab, so remember to click the “Save” button frequently. If you make a mistake, simply avoid clicking the “Save” button to revert to the last saved version.
If you want your game to be available in other languages, you have two options:
- Translate directly in the Editor interface. You can use automatic translation to improve and accelerate your translations right from the interface.
or
- Download the game as a .json file and upload the translated version to the Editor.
Translating directly in Editor’s interface
Manual translation
To translate your game manually, follow these steps:
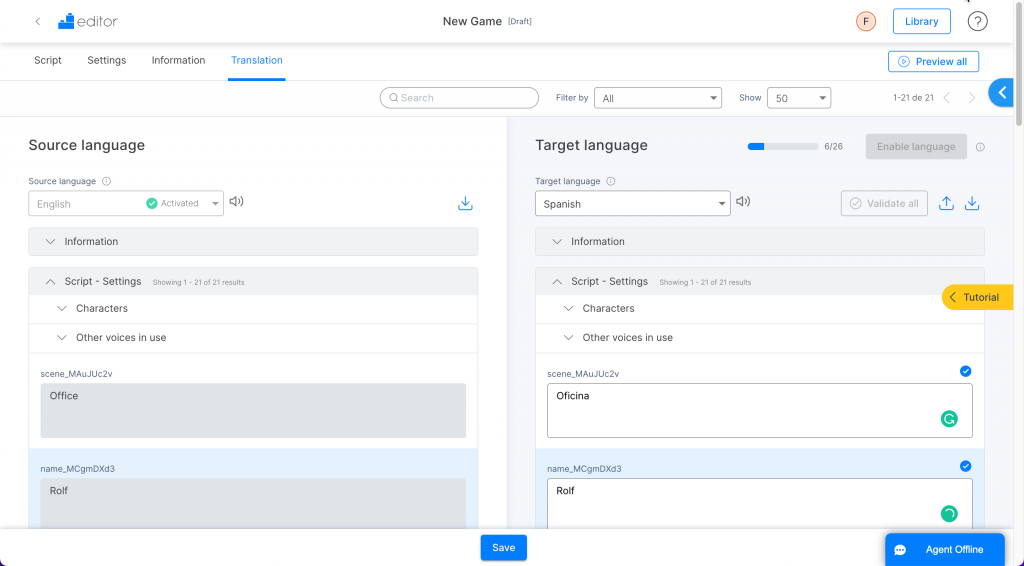
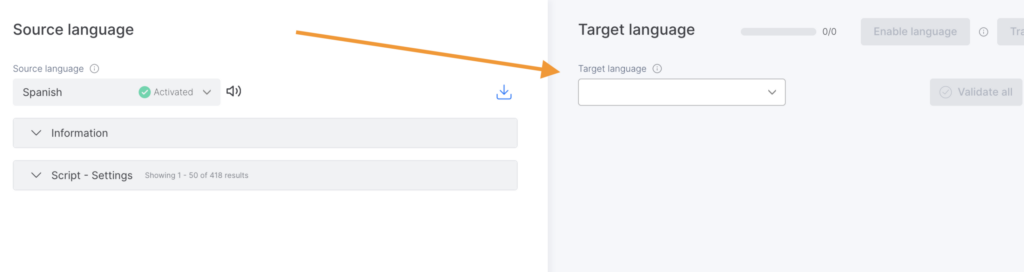
- Go to the translation Tab and select the target language on the right-hand panel.
- Then simply enter the translated texts manually into the corresponding boxes of the Information and Script-Settings sections.
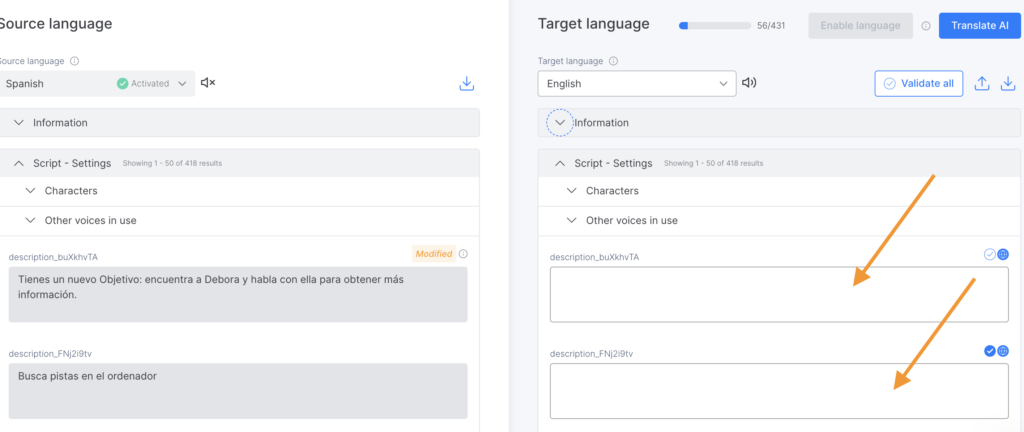
- Use the filter to view only the fields that are untranslated or have been modified in the source language and need review.
Be Careful: Validate all videos, images, and documents added to your game to ensure any translatable text is properly identified. To view only documents, you can also use the available filter.
- Once 100% of the fields are translated, click “Enable language” and save the translation.
- Return to the main Editor interface and locate your game.
- Click “Update” on the course card.
To make your game available in the new language, click “Update” on the course card to republish it.
Translating with artificial intelligence (AI)
From the Translation tab, you can add automatic translations in any language of your choice. Our system includes an automatic translator that lets you convert content from the source language to the target language quickly and easily. To do this:
- Click the Translation tab.
- Select the target language from the available menu.
- Click the “Translate AI” option.
- Once the translation is generated, click “Save translations.” You can also continue without saving.
Additional information: You can also expand the “Information” and “Script – Settings” sections and add translations individually by clicking the blue globe icon in each field.
Important information: The AI translator does not translate information tags or multimedia files.
Translating using a JSON file
To translate your game using a .json file, follow these steps:
- Go to the Translation tab and select the target language from the drop-down menu on the right.
- Click on the download icon to download the full script.
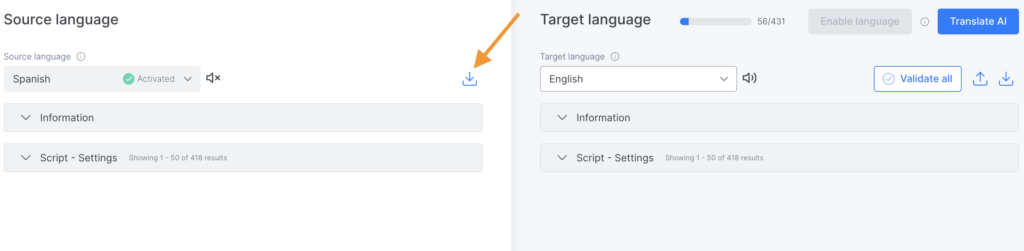
- This will generate a .json file. Using a translation tool that supports the .json format, translate the file into the target language. A new .json file will be created with the translated game content.
- Return to the Translation tab of your game and select the target language from the drop-down menu on the right.
- Click the upload icon and choose the translated .json file. Your translated content will immediately appear in all the fields.
- Use the filter to view fields that have modified text needing review.
Be Careful: Validate all videos, images, and documents added to your game to ensure any translatable text is properly identified. To view only documents, you can also use the available filter.
- Once 100% of the fields are translated, click “Enable language” and save the translation.
- Return to the main Editor interface and locate your game.
- Click “Update” on the course card.
Additional steps:
- Check the number of translated fields at the top right next to the blue bar. For example, if it says “1987/2002”, this means 15 fields are still incomplete.
- Use the filters to locate missing fields or to upload new images or audio files, as explained below.
Important: Every time you modify the game in its original language, even if it’s just a comma, you will have to validate the changes in the translated languages.
Filters in the Translation tab
In the Translation tab, you can easily filter and organize your translated content using the following options:
- All: Displays all available fields in the translation project.
- Translated: Displays only the fields that have already been translated.
- Untranslated: Displays fields that have not yet been translated.
- Modified: Displays fields whose content has been modified in the source language, allowing you to review and update the translation if necessary.
- Documents: Allows you to upload a new PDF, image, audio or video file, or keep the original file by clicking “Use resource from source language”.
In addition, you can adjust the number of fields displayed on the screen by selecting between 25 and 100 fields.
Search bar in the translation
In the Translation tab, you’ll find a search bar at the top of the screen. This tool allows you to locate specific words or phrases, making the translation process faster and more efficient.
The search applies to the entire project content and can be used in both the source and target languages. This means you can search for terms or expressions in either of the two selected languages.
Using Text-to-Speech (synthetic voices) and translating character names
If you selected synthetic voices for the characters in your original game, you’ll also need to assign synthetic voices to those characters in the target language.
To change character names and voices:
- Go to the “Characters” section and click “Settings”.
- Select a voice for each character in each language.
- If desired, you can also change each character’s name for each language.
Note: You can check the settings tab to see the status of the different languages you have translated your game into.
Keep in mind that you can’t assign synthetic voices in a target language unless they are already assigned in the source language.
Be Careful: Even if your game is 100% translated, you must activate the language, save and publish (or update) the game for players to access it in the translated language.
Validating translations in the target language
Whenever you make a change to your game in the source language (even a minor edit, such as a comma or a period), you’ll need to validate those changes in the translated languages.
To easily locate and validate these updates, use the search bar and the appropriate filter by following these steps:
- Use the “Modified” filter to find the sections that were changed in the source language.
- Review the updated content.
- Validate each change by clicking the validation circle on the right side of the text field.
- If you prefer, you can validate all changes at once by clicking the “Validate all” button at the top of the screen.
- Click “Save” to apply your changes.
Important: If you make any changes in the source language, you must validate them in the target language as well, even if the translated text remains the same. Otherwise, you will be unable to publish the new version of the game.
Previewing a translated game
Once your game has been translated, we recommend playing it before publishing.
To preview the translated version of your game:
- Click the “Preview all” button.

- In the previewed game, click the Settings button in the menu (bottom-right corner).
- Select the language you want to play in.
Note: You can also change the language directly in the URL by replacing the corresponding two-letter language code (lang=es, lang=en, lang=fr, lang=de, etc.).
Important: In the game’s “Settings” section, you will find a summary of the active languages, including their status, publication status, and the percentage of translation completed.
Keep in mind that your game must be 100% translated before it can be validated. Once updated and published, the translation will be available to players.